Deploying Data Protection Manager 2007
Microsoft System Center
Data Protection Manager (DPM) was designed to protect Microsoft applications
and Microsoft Servers in an Active Directory environment. DPM uses continuous
data protection. The DPM Server protects the servers, creating and maintaining
a replica of the information stored therein. We can define an interval period
in which to synchronize the data from the protected servers to DPM Server. DPM
captures only the data changes since the last operation and then moves the
changed data to DPM Server in order to synchronize the replica. The process
used to replicate data from protected servers to DPM Server will be explained
in detail in the last article of this series.
DPM also uses Disks to
protect data in the short-term period, which increases backup speed and
restores information when necessary, and it can be combined with tape
libraries. DPM integrates with Active Directory and allows end users to recover
their own file server data from DPM easily through the Previous Version tab in
a protected folder.
We can get an idea of how
DPM protects Microsoft Applications and Servers by taking a look at Figure 01.
Synchronization takes place on a regular basis and the protected information
will be stored on a disk for a configured amount of days and archived later in
a tape. The data synchronization and storage process will be covered in future
articles.
The current DPM version
allows us to protect the following Microsoft products:
Windows XP SP2 and all
editions of Windows Vista that can belong to a domain
Microsoft Exchange Server
2003 SP2 and Microsoft Exchange Server 2007 Storage Groups
Microsoft SQL Server 2000
SP4, SQL Server 2005 SP1 databases
Windows SharePoint
Services 3.0 and Microsoft Office SharePoint 2007 farms
System State of the
protected servers
Microsoft Virtual Server
2005 R2 SP1 host and guest configurations
File data, such as
volumes, folders and shares on file servers and workstations
To deploy DPM 2007 we must
consider the following points before starting the installation process:
DPM must not be a Domain
Controller
DPM should be run on a
dedicated server
DPM and the Protected
Server should be in the same domain, or a two way trust must exist
At least 1GB of RAM in the
DPM Server
DPM must be installed on a
Windows Server 2003 SP2, Windows Server 2003 R2 with SP2, Windows Storage
Server with SP2, Windows Storage Server R2 with SP2 or Windows 2008
The domain controllers
must be running Windows Server 2003 or Windows Server 2003 R2
DPM can protect either
32bit or x64 Operating Systems
Installing Data
Protection Manager 2007
The DPM 2007 setup process
installs by default all the prerequisite software to support DPM Server
installation. In the current version of DPM 2007 (beta 2) the following
software will be installed during DPM Setup:
Windows Server 2003 OS
features
- ASP.Net
- Network COM+ Access
- Internet Information Service (IIS) 6.0
- Windows Deployment Services (WDS) on Windows 2003 Servers running SP2 or
Single Instance Storage (SIS) on Windows Server Storage Server 2003 R2
Windows PowerShell
Microsoft .Net Framework
Evaluation of SQL Server
2005 Enterprise Edition
SQL Server 2005 Service
Pack 2
SQL Server 2005 Tools and
workstation components
Note:
In this article we are going to install DPM using the default values (all the
prerequisites and components will be installed as part of the DPM Setup.
However we will be using an SQL Server on another server to provide the
database and reporting services components required by DPM.
To install DPM 2007 Beta2
follow these steps:
Initial screen. Click on Install Data Protection Manager, as
shown in Figure 02. Now, some prerequisites will be installed automatically on
the system (Microsoft .Net Framework 2.0)
Figure 02: Initial installation screen
License. Check the option I accept the license terms and
condition and click on OK to continue.
Welcome. Initial wizard screen to install DPM, just click on
Next.
Prerequisites Check. The DPM Setup will analyze the server in three
different ways: basic components; required hardware and system attributes. We
can receive two kinds of error messages during the check procedure: Warning
which allows the setup to continue however one should fix anything displayed on
the message as soon as possible; Error which indicates that a required
component is missing or noncompliant. In this case we have to fix it before
continuing with the Setup process. In our article the prerequisite check was
executed and a single Warning message was displayed, as shown in Figure
03.
Tip:
Windows PowerShell is not installed during the DPM Installation Process and we
need to install it manually. To do that we can download and install it from the
PowerShell Download Page.
Figure 03: Prerequisite Check process allows us to validate all
prerequisites
Product Registration. Fill in the User Name and Company information and
click on Next.
Installation Settings. In this section we can define where the DPM will be
installed and choose between installing and using a local SQL Server 2005 (DPM
Setup will deploy this SQL version) or using a remote SQL Server 2005. In our
article we will be installing and using the SQL Server 2005 that will be
deployed by DPM Setup, as shown in Figure 04.
Note:
If a remote SQL Server 2005 was chosen, DPM will use the Reporting Services on
that server. If that server does not have Reporting Services we must install it
on that server before continuing the DPM Server installation process.
Figure 04: Choosing the SQL Server that will be utilized by DPM
Security Settings. We must define a password that will be utilized by
local accounts used by SQL Services. Click on Next.
Customer Experience
Improvement Program. Just click on Next.
Summary of Settings. A summary will be shown with all options that have
been defined. To confirm click on Install.
Installation. This process will take some time because setup is
installing all the required software components to deploy DPM 2007 properly. At
the end we will see a summary of all options installed on the DPM Server.
(Figure 05)
Note:
To install the required Windows components the DPM setup will request the
required Windows Server 2003 media, unless the components have been installed
beforehand.
Figure 05: DPM 2007 was properly installed
Restart the DPM Server to
finish the installation.
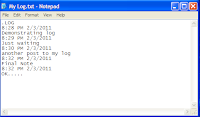
Just to make sure
everything is fine, we can check the installation log files to validate. The
default location is C:\Documents and Settings\All Users\DPMLogs, as
shown in Figure 06.
Figure 06: The DPM Setup process creates log files that can be used to
validate the installed components
Deploying Data Protection Manager 2007 (Part 2)
Continuing our DPM 2007
deployment…
We have just deployed the
DPM Server and before we start getting to know the DPM Administration
interfaces we have to configure three key points:
Understand where and how
DPM can use media to protect the data (disk, tape or both)
Add Disks to the Storage
Pool
Add Agents to protect
servers
After these three topics
above we will be taking a look at each of the key areas of DPM 2007.
Storing the backup data
in disks, tapes or both…
One of the nice features
of DPM 2007 is the possibility of storing the protected data in different ways,
such as disk-based storage (also know as D2D Disk-to-disk), tape-based storage
(also know as D2T Disk-to-tape) and both methods (also know as D2D2T,
disk-to-disk-to-tape), as shown in Figure 01.
Figure 01: The three methods to store the information (Disk, Tape or
both)
This flexibility is set up
at Protection Group level. Using these methods we can configure short-term
periods of data to be stored on a disk because a restore from a disk is much
faster and easier than a tape restore. We can also define long-term periods of
data to be moved to a tape. All these options are defined when creating the
Protection Groups to protect the servers.
Adding disks to the
storage pool
DPM uses a set of disks
called the Storage Pool where it stores replicas and recovery points of the
protected data. We need at least one disk in the Storage Pool to start the
process of protecting the servers.
If we have a basic disk
DPM will convert it to a dynamic disk in order to add it to the Storage Pool.
In DPM Beta2 we can add any physical disk and it will use only the unallocated
space of the selected disk. We are going to add the disk shown in Figure 02 to
the DPM Storage Pool.
Figure 02: The disk that will be added to the Storage Pool
To add disk1 into the
Storage Pool follow these steps:
Open the Microsoft
System Center Data Protection Manager.
In the Navigation bar
click on the Management area.
In the Display Pane, click
on Disk tab.
In the Actions pane, click
on Add..
Add Disks to Storage
Pool. In the left frame all available
disks that may be used by DPM will appear. Click on the disk and click on the Add
-> button (Figure 03). The disk will be moved to the right frame and we
can see the disk name, capacity and if there is any data on the disk. Click on OK.
Figure 03: Selecting a disk to be added to the Storage Pool
Now we can see the disk
that has just been added to the Storage Pool (Figure 04). We can also see the
disk status, how much is allocated for protection, how much space is still unallocated
and which Protected volumes are on this specific disk.
Figure 04: Disk Management with a recently initialized disk that will be
added to DPM Disk Storage Pool
Deploying the DPM
Agents
Let’s install the agents
on the DPM Protected Servers. Agent installation can be done manually or
through the DPM Administrator Console. The agent will be installed as a service
called DRMA on the Protected Servers.
Open the Microsoft
System Center Data Protection Manager.
In the Navigation bar
Click on the Management area.
In the Display Pane, click
on the Agents tab.
In the Actions pane, click
on Install…
Select one or more servers
on which to install the agent, as shown in Figure 05, and then click Next.
Figure 05: Selecting the Servers on which the DPM Agent will be
installed
Enter Credentials. Specify a user name, password and domain as well with
Installation rights on the server that DPM Agent will be installed, and click Next.
Choose Restart Method. Install the Agent and automatically restart the
server or install the agent and restart the server manually. Click Next.
Summary. Validate which server or servers will receive the
Agent, and click on Install.
Now click on Close,
the status of the installation will be shown, as in Figure 06.
Figure 06: The newly installed agent - validate the agent’s version,
status, and to which group it belongs
Using the DPM 2007
Administrator Console
We can work with DPM
through the Administrator Console or through the DPM Management Shell that
allows the use of PowerShell.
The DPM Administrator
Console has five distinct areas that can be managed. These areas are:
Monitoring, Protection, Recovery, Reporting and Management. We will go over
each of these areas to see what we can do in each.
DPM 2007 Administrator
Console
Monitoring
This area allows us to
monitor the status of DPM Operations, and is divided in two distinct tabs:
Alerts and Jobs.
Alerts: This tab displays messages about agents, backup and
restore procedures. We can group these alerts using the Group by combo
box (Figure 07).
Jobs: Show the status of jobs and the tasks associated
with them. We can also group the jobs using the Group by combo box and Filter
names. The jobs listed in this area are set up automatically during the
Protection Group creation process (Figure 08).
Figure 07: The Active and Inactive DPM alerts
Figure 08: Jobs
Protection
In this area we can manage
the Protection Groups, Protection Schedules, disk allocations, etc. We can also
synchronize and create a Recovery Point. We can see all the servers in the
Protection Groups. We can click on a specific item and validate some points,
such as: how many recovery points are available, the oldest and latest recovery
point and figure out how much disk space is being used to protect the specific
item, as shown in Figure 09.
Figure 09: Protection Groups
Recovery
In the Recovery Area we
can recover data that has been protected by the Protection Groups. We can see
all the servers and protected items in a single view, and we do not need to
move from the screen to do an Exchange, SharePoint, SQL or a Windows File
Server restore procedure. We can use the calendar to see the days and specific
times that we have a recovery point available. We can also see which media has
the selected recovery point (disk or tape), as shown in Figure 10.
We can use the Search Tab
to find available recovery points using variables, such as: file or folder
name, recovery point range and the original location
Figure 10: The Recovery area that allows us to recover data from the DPM
Agents
Reporting
The Reporting Service has
some reports that allow administrators to measure some items, such as:
statistics, performance that might help with hardware resource capacity
planning. We have the following built in reports and they can be seen in Figure
11.
Disk Utilization
Protection
Recovery
Status
Tape Management
Tape Utilization
Figure 11: The available DPM reports
We can also configure the
reports to be generated on a regular basis and sent to a selected e-mail
address. Click on the Report, and on the Details Pane, we have two options:
Schedule and E-mail, both of them have an Edit links below.
In the Schedule (Figure
12), we can configure the frequency and report parameters. We can also define
how many version we will keep in the history.
Figure 12: Defining a schedule to generate the Disk Utilization Report
In the E-Mail tab, we can
define who will receive the scheduled report. To add more than one mailbox just
add a semi-colon between the e-mail address (Figure 13). We can also configure
the format of the attached file that will come with the message, such as HTML,
Excel or PDF.
Figure 13: Specifying the recipients that will receive this report
We can right-click on a
report and click view to see it. A sample report can be seen in Figure 14.
Figure 14: Report extracted based on DPM Activity - schedule report
generation or see it in real time
Management
In the Management Area we
can play with the DPM Server components which interact with the servers and
store the data. These items are: Agents, Disks and Tape library
Management of disks and
agents has already been done in order to prepare DPM to be used.
DPM Management Shell
DPM 2007 can be managed
through Windows PowerShell using the DPM Management Shell. In the DPM
Management Shell some tasks that are not possible through DPM Administrator
Console can be accomplished. Scripts can also be created to facilitate daily
tasks. To see a list of all available DPM cmdlets use: get-DPMCommand.
Figure 15: Starting the DPM Management Shell
Deploying Data Protection Manager 2007 (Part 3)
What does DPM protect?
DPM protects several
Microsoft products. Table 01 lists the products that can be protected
and which items within the products that can be restored.
Microsoft Products
|
Item(s) that can be
protected
|
Recoverable Items
|
Exchange Server 2003
with SP2
Exchange Server 2007
|
Storage group
|
Storage group, Database,
or Mailbox
|
SQL Server 2000 with SP4
SQL Server 2005 with SP1 or higher
|
Database
|
Database
|
Microsoft Office
SharePoint Server 2007
Windows SharePoint
Services 3.0
|
Farm
|
Farm, Database, Site,
File or list
|
Windows Server 2003
Windows Storage Server 2003
|
Volume, Share and
Folders
|
Volume, share, Folder or
File
|
Microsoft Virtual
Server 2005 R2 SP1
|
Virtual Server host or
Virtual Server machines
|
Virtual Server host or
Virtual Server machines
|
Protected servers
running Windows 2003 and XP
|
System state
|
System state
|
Windows XP with SP2
Windows Vista
|
File data
|
File data
|
Table 01
DPM also protects a
cluster environment of those applications (File Server, Exchange and SQL). To
restore entire machines DPM has an additional tool called DPM System
Recovery Tool that allows a bare metal recovery of the protected servers;
this tool does not come with the DPM 2007 DVD but can be found on a separate
disk.
Creating a Protection
Group
All DPM Protection is
based in the Protection Group; the protection group defines retention
range, how often synchronization will occur, how many recovery points will be
available, where the protection will be kept, etc. Understanding how to create
a Protection Group and its options is crucial in order to protect a network
using DPM.
When creating a Protection
Group we do not have to know where the application's files are located in the
file system. If we select an SQL or Exchange database, DPM will gather
information from the product and it will automatically find where the files are.
In order to create a Protection Group to protect two shared folders follow
these steps:
Open the Data Protection
Manager 2007 Console.
Click on the Protection
task area.
In Toolbox Actions, click
on Create Protection Group:
Welcome to the New
Protection Group Wizard page; there is an introductory text about the process
that will be used by DPM to protect the selected computers, click on Next.
In the Select Group Member
page, we can see all the servers that have been installed with the DPM Agent.
We can choose several items at the same time. In the Figure below we are able
to protect some items such as Exchange Server Cluster, Shares, Volumes, System
State and SQL as well. DPM is application aware, this means that we do not need
to specify the path of Exchange and SQL database and log files, just select the
component (SQL databases or Exchange Databases).
In this tutorial we are going to check two shares (Share01 and Share02) and
they will show up in the Select members area (Figure 01).
Figure 01: Selecting some items
among the servers with the DPM Agent installed
We still have two options
in the Selected members frame that are: Excluded Folders and Excluded
file types.
Excluded File types: We can exclude file extensions, which will then not
be protected. To do that we just need to click on the Exclude Files:
link and type in the extensions required, as shown in Figure 02.
Figure 02: Excluding the extensions
.mp3 and .tmp files to be protected
Exclude Folders: When a directory with several subdirectories is
selected, we can unselect the subdirectories that do not need to be protected.
This option will show all subdirectories that are unchecked. In the example
below the Inetpub folder was selected and the subdirectory AdminScripts was
unchecked. (Figure 03)
Figure 03: All directories that are
not protected
In the Select Data
Protection Method page we can define the Protection Group name and we can
define which method we are going to use in this protection group: Disk
(short-term protection), Tape (long-term protection) or both. Only the
available options will be displayed, in our article a tape library is not
installed, so the Tape protection option is disabled. (Figure 04)
Figure 04: Defining the Protection
Group name and the method that will be utilized
In the Specify
Short-Term Goals page, we will define the Disk Based protection plan for
the data and servers already selected. The options that we can define are how
many days of retention, synchronization frequency and how often a recovery
point will be created. At this point it is important to understand what the Synchronization
Process and Recovery Point are for.
Synchronization process
DPM maintains a replica of the
synchronized protected server data. All the information is stored in the DPM
Storage Pool or in a custom volume. The synchronization process depends on the
data that we are working with, as follows:
File data: the DPM agent uses a volume filter and the Operating
system change journal to track which files have been changed, created or
deleted since the last synchronization job.
Application data: the DPM Agent uses the VSS Application writer to
identify which disk blocks have changed. Those changes will be applied to the
DPM replica. If the application supports incremental backups a recovery point
will be created for each synchronization (Exchange and SQL).
To summarize, all changes
made in the Protected Servers will be transferred to DPM Server in order to
keep the replica updated on a regular basis.
Recovery points
A recovery point is a point-in-time version of the data protected by the DPM
Server. We use recovery points to recover data. For file servers the recovery
points allow the Administrator and users to recover data, for applications
(such as Exchange and SQL) we are able to restore the data from recovery points
and synchronize as well.
In Figure 05 we can see how often a file recovery will occur, the retention
range for the data and how often the data will be synchronized.
Figure 05: Specifying short-term goals
By clicking on the Modify
button, we can define at which time and days we will be creating recovery
points. We have to plan the number of recovery points carefully. If we have a
higher number of recovery points per day it will decrease the retention range
because we cannot have more than 64 recovery points for file data. PS: This 64
limit is not applied for applications. We have to run a recovery point at least
once a week.
Review Disk Allocation page. We can define space for Replica and Recovery
Volumes, a graphical view of the current status of the Storage Pool will be
shown (Figure 06). We can click on the Modify button to change the
volume sizes; DPM uses the current volume information of the protected server
to calculate the proper size.
Important: We cannot shrink the size of a Disk Poll after definition; we must
recreate the Protection Group, on other hand we can increase the current size
without playing with the Protection Group.
Figure 06: Defining the disk space
allocation for the new Protection Group
In the Choose Replica
Creation Method page we can define how and when the initial replica of the
selected data will be created. The initial replica can be done manually,
immediately or at a scheduled time. (Figure 07)
Figure 07: Defining when the initial
replica will be executed
Summary page. A list with
all the defined settings will be shown in this page. The information should fit
with the company requirements. In Figure 08 we can easily see that the
protected shared folders will be kept for 5 days, data synchronization will
occur every 30 minutes, and we will be able to recover the data 3 times in a
day. To create the Protection Group with the defined settings click on Create
Group.
Figure 08: Summary of the
information that will be used to create the Protection Group
Status page. A final page
showing the tasks performed to create the Protection Group will appear, just
click on Close.
Now, we can open the Disk
Administrator and we will see two new volumes in the DPM Storage Pool disks,
those disks will be responsible for keeping the data of those shared folders in
the Protection Group.
Examining the Protection
task area
After creating the
Protection Group we can view information about the selected Protection Group in
the Details Pane. We can also tinker with the Protection Group through the
Actions Toolbox where we can modify the disk allocation, perform consistent
checks and create recovery points, as shown in Figure 09.
Figure 09: Additional information and the current status of the Protection
Group
Deploying Data Protection Manager 2007 (Part 4)
Using
the Recover section of the DPM 2007 Administrator Console
Using the DPM 2007 Administrator
Console we can recover all sorts of protected data from a single point of view.
To start any recovery process we just need to click on the Recovery
item. We have two tabs: Browse and Search, the first tab allows
us to list all protected servers and their data that has been protected by DPM
server.
We can expand Data on Disks and
Tapes, domain name, server name and we will be able to see all components
that have been protected by DPM. In this article series we are protecting two
shared folders, and these folders can be accessed either by driver letter (in
our case C:\) or All Protected Shares. Let’s click on C:\ and on
the right hand side we have a calendar which shows, in bold, all dates that
have at least one recovery point of the selected item, beside this calendar we
have all the available recovery points for that day, and we also have an icon
indicating where the protected data is located (source or disk).
Figure 01
If you have a large environment with
several protected servers you can filter by server name. To do that, just fill
in the server name under the Server field and click on the Filter
button. Then only the server will be listed in the right hand side of the recovery
section.
Figure 01 shows all the shares, but we
might want to recover a single file that is under those folders, to do that
just double click on the directory folder and we will see all the files and
subfolders of that specific share.
Now, let’s click on the second tab
called Search (Figure 02). In this tab we can search the protected data
with queries using some variables. First of all we have three different types
of data to search, they are: Files and folders, Mailboxes and Sharepoint. Each
option has its own parameters to facilitate the search of the respective data.
Let’s create a file to find all the
.txt files (Folder or file name section) during a certain range of time,
(Recovery point range section) which might be in the server and path drive
specified in the Original location (required) section. After creating a
query to match our needs, we just need to click on the Search button. On
the right hand side we will have all the occurrences found and we have some
useful information such as: file name, path, last modified, size, Recovery
Point date and finally where the information is located (disk or tape).
Figure 02
Before starting our recovery process,
let’s go back to the Browse tab to validate the Show all recovery
points feature. We can use that feature to list all available recovery
points associated with the selected data in a single screen (Figure 03),
instead of having to change the days in the calendar to validate if the item is
there. In our example we are looking at all available recovery points for the
share02 folder. We can see that we have only two recovery points available to
recover that data from and all information is located on a Disk.
Figure 03
Recovering
data using DPM 2007
Now that we have just seen an overview
of the recovery section, let’s select a file to be recovered and let’s click on
the Recover… item in Toolbox Actions. Follow these steps to finish the
recovery process:
- Review Recovery Selection. After selecting the data and
clicking on Recover… the first screen of the Recovery Wizard will
contain the details of the data that will be recovered (Figure 04). Let’s
just click on Next.
Figure 04
- Select Recovery Type. We can choose the original
location, an alternate location or Copy to tape (where the entire volume
where the data resides will be copied to tape). Let’s select Recover to
the original location and click on Next. (Figure 05)
Figure 05
- Specify Recover Options. We can play with some options
(Figure 06), if the data to be restored already exists in the original
location (chose in the previous step) we can create a copy, skip or
overwrite. Let’s create a copy, we can also play with the security
permissions where we can choose to apply the original permissions (Apply
the security settings of the recovery point version) or use the
current source permission (Apply security settings of the destination
computer).
If the DPM has the SMTP server defined we can tick the option Send
an e-mail when this recovery and fill out the user name that should be
notified when the recovery data is available.
To continue our process, just click on Next.
Figure 06
- Summary. Just an overview of all our
choices up to now, click on Next.
- Recovery Status. Final screen will appear
displaying the operation result (Figure 07), how much time was spent in
the operation and how much data was transferred from DPM server to the
server.
Figure 07
Now that we have seen how to recover an
item using DPM 2007 we can use the same process to recover a mailbox, SQL
Database, Virtual Server, etc…
Controlling
network bandwidth
We can control the network bandwidth
used by a DPM server.
- Open DPM Administrator Console.
- In the Navigation Bar click on
Management.
- In the Display Pane click on the
designated server that you want to throttle.
- In the Action Pane click on Throttle
computer…
In the Work Schedule section we can configure the days of the week and the
start and end time, everything outside of this is non-work hours. After
configuring our work hours properly we can assign throttling in both
cases, we can use kbps and Mbps. By default, when the Throttle feature is
enabled the default value will be 128 Kbps for Work hours and 9999 Mbps
for non-work hours (unlimited), as shown in Figure 08.
Figure 08
But before using this feature shown
above we must make sure that the QoS component is installed and enabled on DPM
Server and on the agents as well.
- Enter the properties of the
network connection that DPM will use to protect the designated server.
- By default the QoS Packet
Scheduler is not installed. Click on Install.
- In the Select Network component
Type, click on Service and click Add.
- Click on QoS Packet Scheduler and
click OK.
- In the Local Connection
Properties, make sure that the QoS Packet Scheduler is checked, as shown
in Figure 09.
Figure 09
- Repeat this process in all the
agents that will use the throttle feature and in the DPM server as well.
http://www.petri.co.il/data-protection-manager-setup.htm
Exchange Server 2010: Data Protection Manager
Setup
Overview
Looking
to learn how to set up Microsoft’s Data Protection Manager? You’ve come to the
right place. But before we show you how to set up DPM, we’d like to briefly go
over the underlying concepts and terms associated with DPM to make sure we’re
starting off on the same foot.
Let’s
begin.
DPM
Replicas and Synchronization and How They Provide Continuous Data Protection
There
are a number of backup solutions that can handle your Microsoft Exchange data.
But if you need a product that’s specifically designed for Exchange 2010 -
especially if you’re running a DAG
(Database Availability Group) - then Data Protection Manager (DPM)
is one of the highly recommended options. DPM can already provide continuous
data protection for Exchange, which is much better than what traditional backup
tools can offer.
Traditional
backup tools can restore data only up to the point when the last backup was
made. With DPM, a protection group member (more about protection groups below) can be fully recovered from just about any recovery point,
which is characteristic of continuous data protection. Much of this capability
relies on DPM’s block level replication and synchronization feature.
DPM
block level replication and synchronization starts with the creation of an
initial replica similar to what you have after a full backup. Then each time a
block undergoes a change, that block is synchronized with the replica.
Essentially, DPM can achieve the same outcome as a traditional full backup each
time a synchronization is made but with the advantage of having much shorter
backup windows.
Replicas
can be created either manually or automatically. Manual creation is ideal if
you have a slow network or if you have to create a replica of a large amount of
data. Automatic creation, on the other hand, is best for fast networks or small
amounts of data.
Data
Protection Manager Can Provide Protection Beyond Exchange
DPM
is not only built for MS Exchange. Actually, the System Center Data Protection
Manager can support the following:
● Windows Server 2003
through 2008 R2
● Essential Business
Server 2008
● Small Business Server
2008
● SQL Server 2000 through
2008 R2
● Exchange Server 2003
through 2010
● SharePoint Server 2003
through 2010
● Dynamics AX 2009
● SAP Running on SQL
Server
DPM Agents
A
DPM Agent is a program that you need to deploy on each computer you want to
protect. This includes both servers and workstations. It enables your DPM
Server to browse the contents of those computers.
So
if you have a DAG and you want to backup its member servers using DPM, then you
need to deploy a DPM Agent on each DAG member. Deployment can be done either
manually or through the admin console.
Protection
Groups
Your
backup and recovery characteristics are usually influenced by factors such as
your organization’s business requirements, network performance, and the kind of
data you’re handling. If you have data sources having similar backup and
recovery characteristics, you can put them together into what are known as
Protection Groups.
All
members of each Protection Group will share a common set of protection
configurations. For instance, they will have the same back up targets (e.g.
disk or tape), schedules, recovery point (a.k.a. snapshot) intervals, and so
on. Typical members of a group include Exchange Server databases or mailboxes.
You can put different servers having different databases into one group.
DPM Storage Pools
A
DPM storage pool refers to the set of disks where information backed up from
other computers is stored. Always remember never leave important data on disks
you intend to use later on as storage pools. It wouldn’t matter how large the
free space on those disks are. Once DPM starts writing on those storage pool
disks, those previously stored data will be wiped out.
What
kind of disks are supported?
DPM
can support Direct Storage (SAS or SATA) or Networked block level storage
(Fibre Channel or iSCSI). However, it cannot support FireWire disks. Also,
although DPM can be installed on a virtual server, you cannot use VHD files
(virtual hard disk files) in your storage pools. If you have to install it on a
virtual server, then we suggest you go for a iSCSI disk.
System Requirements
Before
you can install Data Protection Manager, you need to have the following in
place:
Minimum requirements for the DPM Server
● Processor: 2.33 GHz quad
core CPU
● RAM: 8 GB
● Pagefile size: 1.5x
system RAM
● Available disk space for
the installation: 3 GB
Software prerequisites
● .NET Framework 3.5 with
SP1
● Visual C++ 2008 Redistributable
● PowerShell 2.0
● Windows Installer 4.5 or
later
● Single Instance Store
(SIS)
● Application Error
Reporting
SQL Server Requirements and Pre-DPM
Installation Configurations
In
addition to those hardware and software requirements mentioned, you will also
need either a 32-bit or 64-bit version of SQL Server. In particular, you need
SQL Server 2008 SP1 or higher. As of the moment, there is no support yet for
2008 R2.
To
achieve optimal performance and security, do not install SQL Server on a Domain
Controller.
SQL
Server can be installed either locally or remotely. A local installation means
SQL Server will be placed in the same server as Data Protection Manager. Most
admins prefer it this way because if you separate the two, you’ll end up with
two single points of failure. Thus, if the SQL Server goes down, the entire
system will suffer even if your DPM is still up and running.
Another
advantage of installing SQL Server locally is that you don’t have to perform
the actual SQL Server installation yourself. In the course of the DPM
installation, SQL Server will be installed automatically. You’ll see this later
on in this article when we walk you through the actual installation process.
During
the installation of SQL Server, make sure the following components are
included:
● Database Engine
● Reporting Services
● Management Tools
● SQL Client Connectivity
SDK
Basically,
when you’re in the process of selecting features for a SQL Server installation,
select the checkboxes corresponding to each of the features mentioned earlier. After
installing SQL Server, you still have to configure some of its settings before
proceeding to the actual DPM installation.
To
begin, go to Start > All Programs > Microsoft SQL Server 2008 >
Configuration Tools > SQL Server Configuration Manager.
Once
inside the SQL Server Configuration Manager,
expand the SQL Server Network Configuration
node and select the Protocols for MSSQLServer.
Make sure that Named Pipes is
Enabled.
Next,
you have to install the DPM support files on SQL Server. Navigate to the
location of your DPM installation files. For example, if you have an
installation disk on drive D:, go to Start > Computer > D:, then explore
the disk (right-click the disk then select Open).
Note:
Don’t run the installation yet. If the installer’s splash screen appears, just
click Exit.
Find
the SQLPrepInstaller folder. Inside
that folder, you’ll find the SQLPrepInstaller files, SQLPrepInstaller_x64 and SQLPrepInstaller_x86. Execute
the SQLPrepInstaller file that that corresponds to the flavor of SQL Server you
installed earlier.
Finally,
navigate to the Services
window (Start > Administrative Tools > Services) and open the SQL Server Agent service. You
may have to scroll down to find it.
Make
sure the Startup type is set to Automatic.
After
all that, restart the SQL Server service. We also recommend that you reboot
your computer before starting the DPM installation.
Installing
Data Protection Manager
Navigate
again to the DPM installation disk. This time, when the splash screen appears,
click Install Data Protection Manager.
Go
through the License Terms and Conditions in the succeeding screen and click the
checkbox to affirm. After you click the OK button, a
small window with a progress bar appears. The Setup program will then perform
some preliminary tasks in preparation for the DPM installation. Once that’s
done, you’ll come face to face with the welcome screen of the Data Protection Manager Setup Wizard.
Just click Next.
The
wizard will then check if you’ve met all the prerequisites. If all goes well,
click the Next button.
In
the Product Registration window,
enter a User name and the name of your Company, then click Next.
Next
up is the Installation Settings window.
The
DPM Program Files section is
where you can specify where you want to place the DPM program files. Leave it
unchanged if you want to accept the default location.
In
the SQL server settings section,
you’ll be asked to choose between these two options:
● Use the dedicated
MSDPM2010 instance of SQL Server, or
● Use an existing instance of SQL Server 2008
In
our case, we are choosing the first option because, if you recall, we’re going
for a local installation of SQL Server on the same server as the DPM server. So
in effect, this will automatically install SQL Server as well. On the other
hand, if you’re opting for a remote installation of SQL Server, then you should
select the second option and enter the necessary information for that remote
server.
The third section contains
the space requirements for the installation as well as the space you have
available. Naturally, you’ll want the values on the right column to be greater
than the values on the left.
Click Next when you’re
ready to protect.
In the security settings
window, you’ll be asked to enter a password for a couple of restricted local
user accounts. Just enter a strong password twice (the second to confirm) and
click next.
You’ll then be asked
whether you want to use Microsoft Update. Select you’re preferred option and
click Next when you’re done choosing.
After that, you’ll also be
asked whether you want to participate in the Customer
Experience Improvement Program. Again, select whichever option
you prefer and click Next.
For the final step, the
wizard will show you a summary of the configurations you set earlier. Click Install if everything looks
fine.
Installation may take some
time, so you might want grab a cup of coffee and let the DPM Setup Wizard take
it from here.
Once the wizard reports
that the Data Protection Manager installation completed successfully, you can
then breathe a sigh of relief and click the Close
button.
After closing all open
windows, you’ll find a couple of icons on the desktop. Open the one named Microsoft System Center Data Protection Manager
2010. You’ll then see the user interface of the DPM 2010 Administrator Console
as shown below.


 Solitaire: Instant Win
 FreeCell: Instant Win
 Hearts: Show All Card
 Minesweeper: Stop The Timer
 Pinball


